Steampunk Lamp 1 August 2016
I'm happy to admit that I am a bit of a geek, so it should be no surprise that I love steampunk; not the role playing thing, just the artifacts. When I saw a picture of one of these steampunk lamps, my initial reaction was "not in my house" but I have come around. Most of these lamps use a large gear as a base, but I have an old cast iron vacuum pump sitting around which I have always admired, but had no clue what to make with it. The plan is to use the lamp in the library.
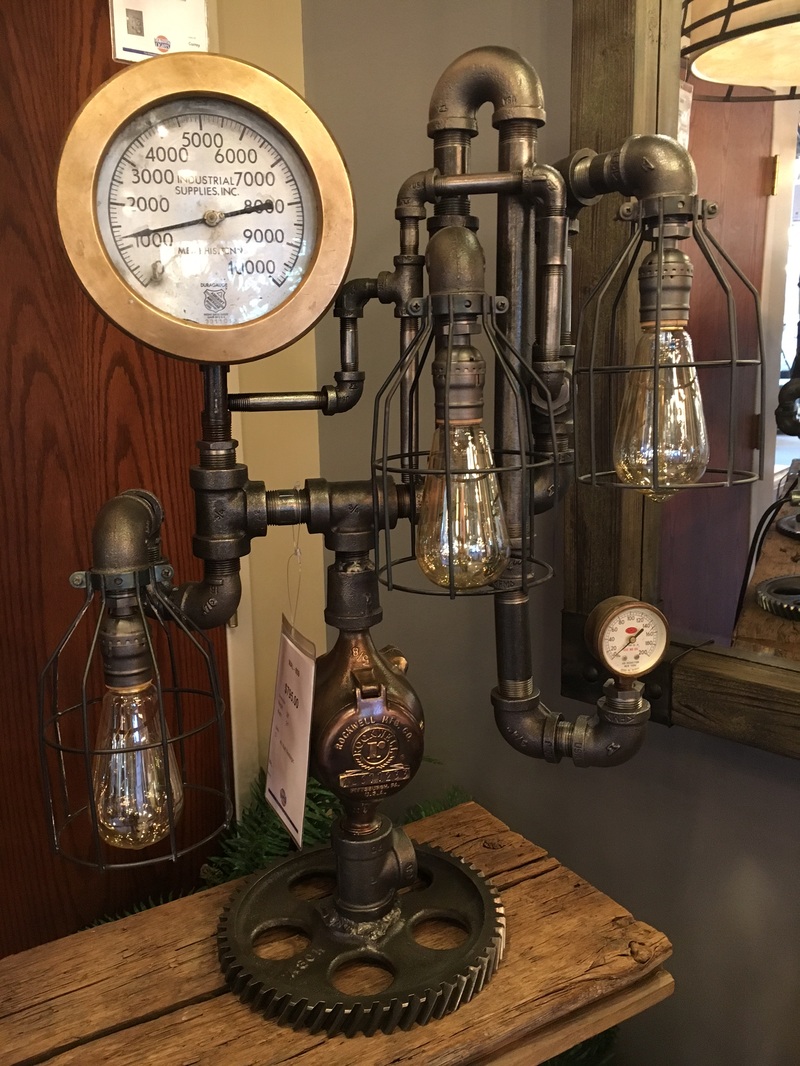
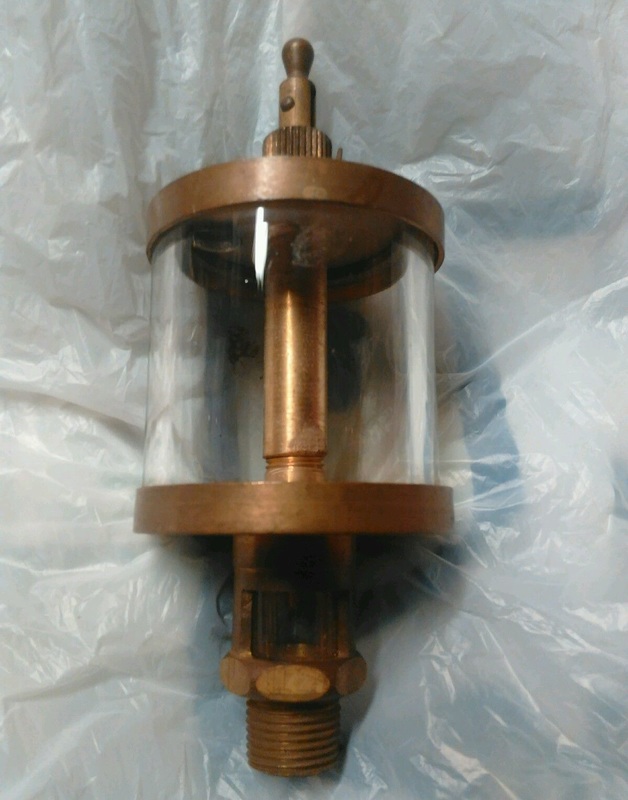
This is sort of what I am aiming for.
This is sort of what I am aiming for.
2 August 2016
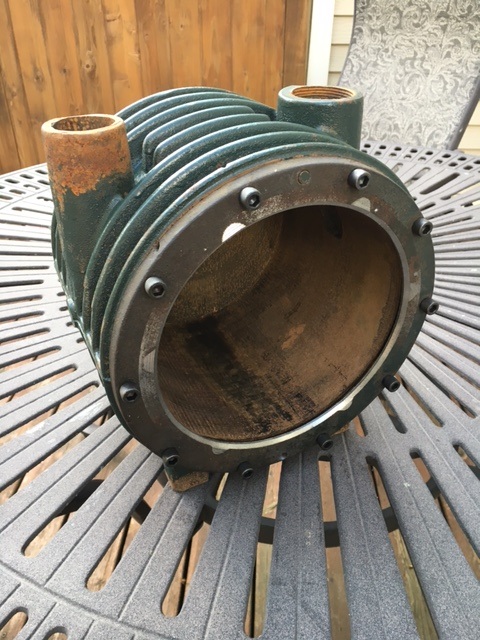
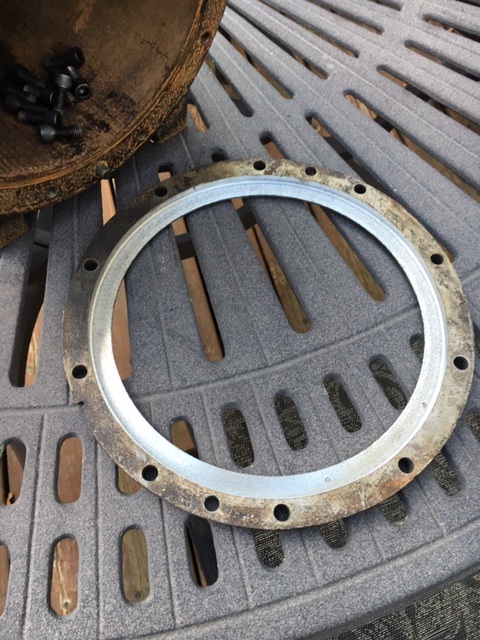
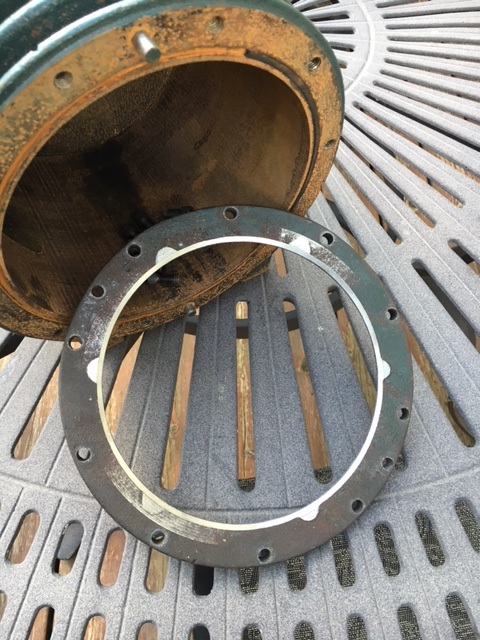
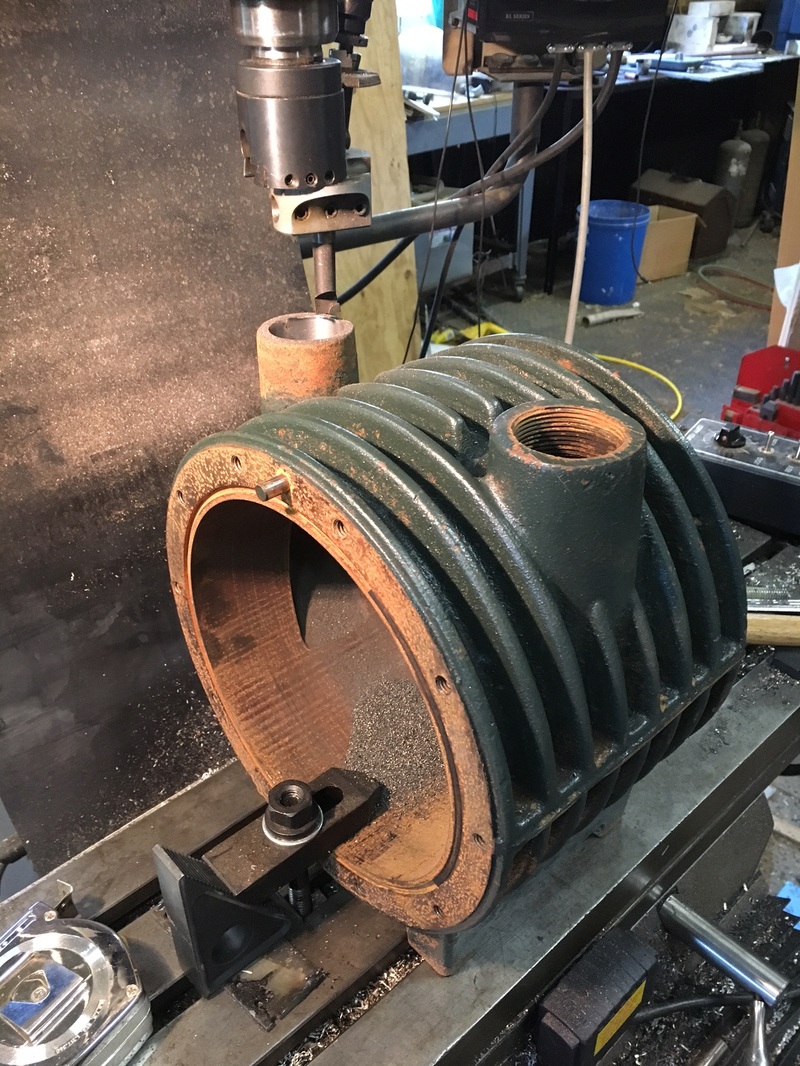
I bought this vacuum pump at auction about twenty years ago because I liked how cool it looked. It was in bad shape as a vacuum pump but had inner beauty, so I pulled it out, cleaned it up and spent the day machining it for my lamp. The front plate looked almost identical to the back plate shown, but I machined it into a ring to mount a 1/4" round plate of glass. I will bore out the vacuum port on the top to accept a pipe like the other port.
It was tedious cutting out all the cast iron from the front plate to make that mounting ring. The groove in the inside of the ring is 0.265" x 8.75".
|
|
|
|
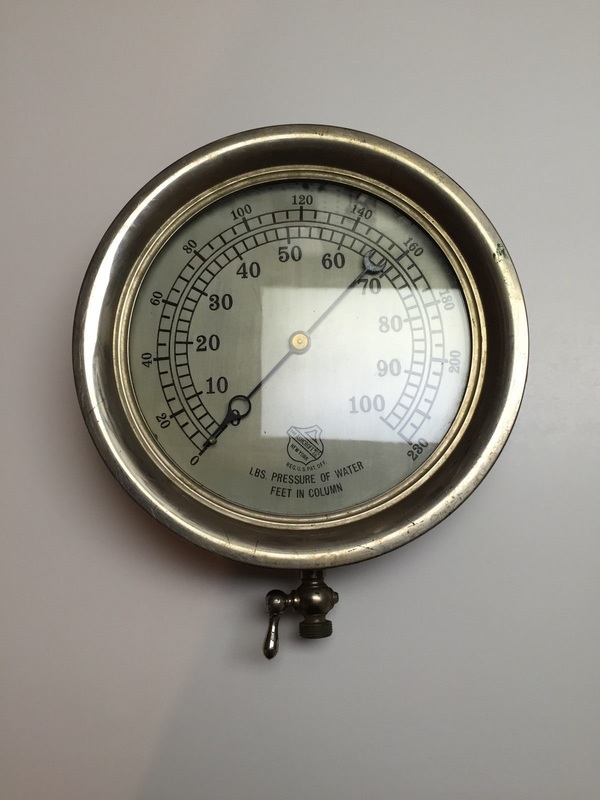
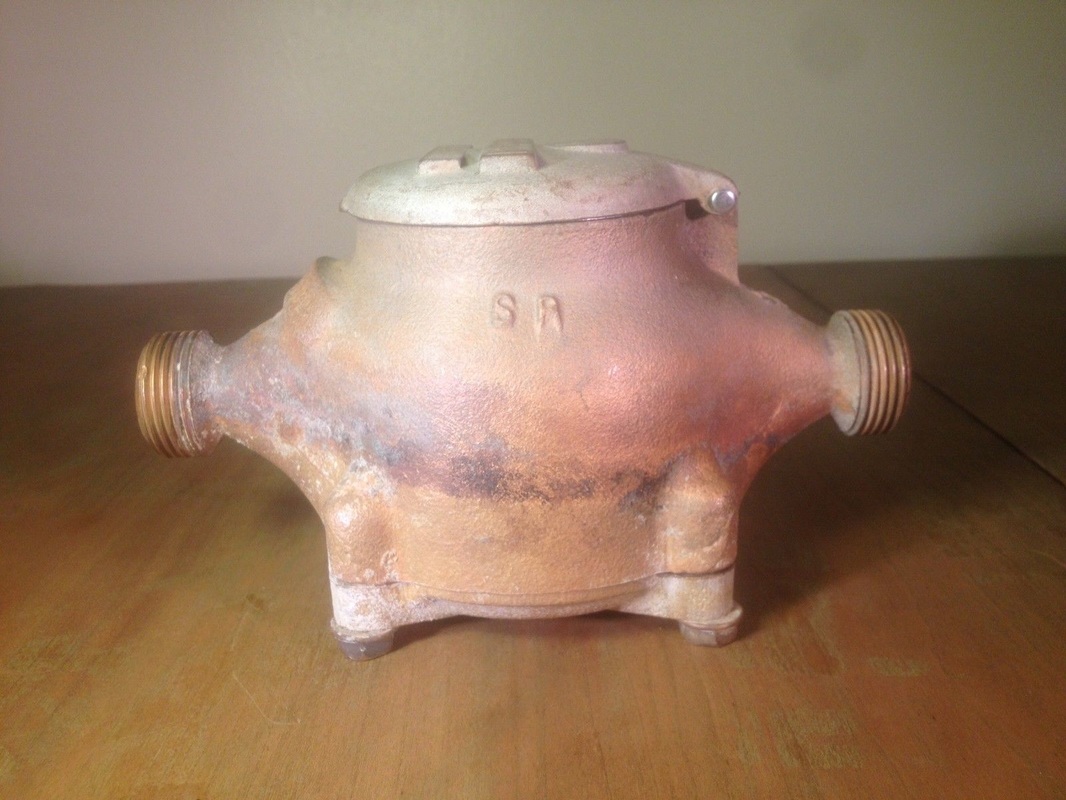
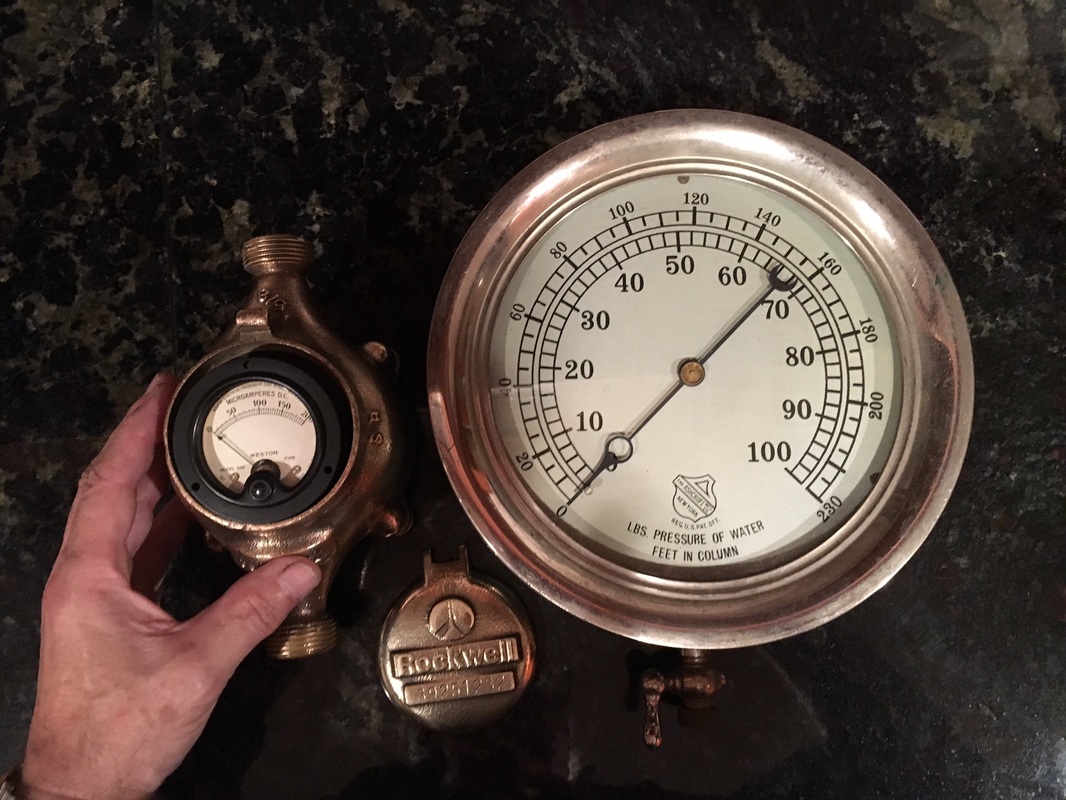
Here are three of the vintage accouterments I have on order to build the lamp - 10" pressure gauge, brass Rockwell water meter, and a brass engine oiler. The water meter, center, needs a lot of work.
|
|
|
3 August 2016
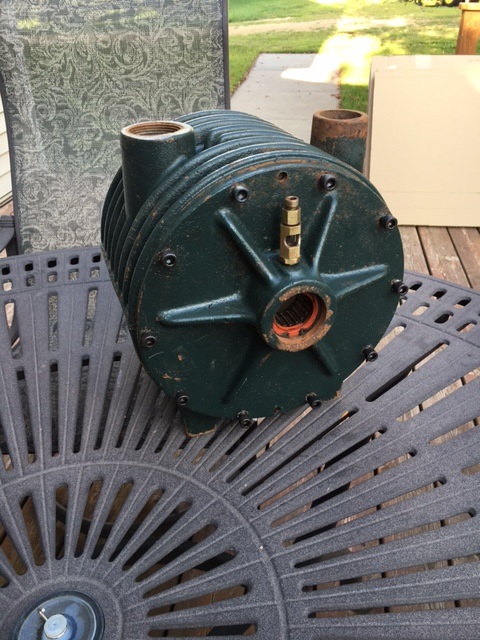
Here is the base bolted to the mill and being bored for a pipe fitting in the vacuum port, which is not threaded. The only difficult part is getting the vacuum port accurately centered on the boring bar. I took the cast iron ring I machined into a glass shop and they are cutting a 1/4" glass plate to fit.
Here is the base bolted to the mill and being bored for a pipe fitting in the vacuum port, which is not threaded. The only difficult part is getting the vacuum port accurately centered on the boring bar. I took the cast iron ring I machined into a glass shop and they are cutting a 1/4" glass plate to fit.
|
|
4 August 2016
As you can see, the gauge is quite large and perhaps not apparent, it is very well made. It has a thick brass (nickel plated) rim, cast iron back and glass about 3/16" thick. I took the water meter apart and cleaned it up a bit as well as removing the meter itself. I plan on installing a 100 microamp meter of the old style instead of the water meter because it looks nicer. The glass for the base is supposed to be ready for pickup tomorrow so I'll post a picture then.
As you can see, the gauge is quite large and perhaps not apparent, it is very well made. It has a thick brass (nickel plated) rim, cast iron back and glass about 3/16" thick. I took the water meter apart and cleaned it up a bit as well as removing the meter itself. I plan on installing a 100 microamp meter of the old style instead of the water meter because it looks nicer. The glass for the base is supposed to be ready for pickup tomorrow so I'll post a picture then.
7 August 2016
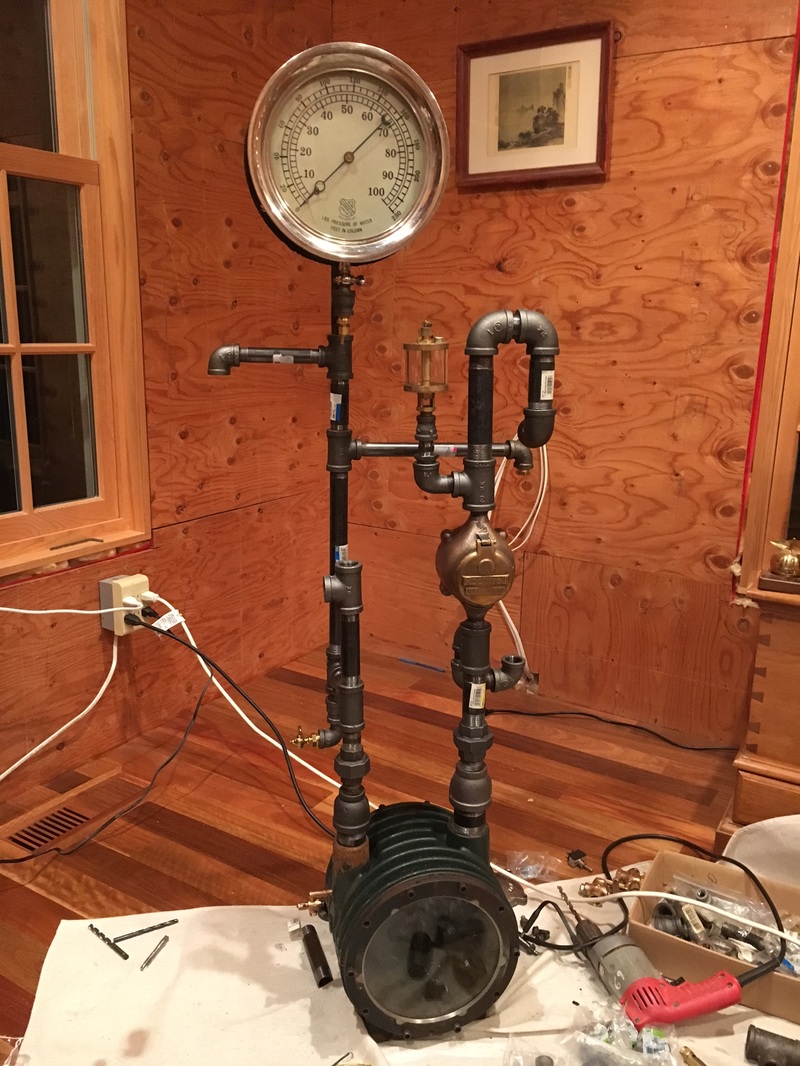
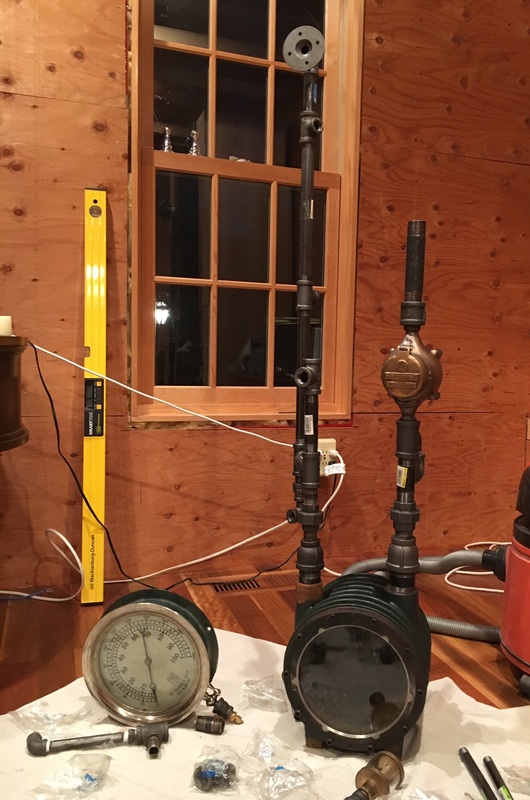
My first priority is positioning the larger pressure meter, so I have been playing around with various black pipe fittings - the results are below. I machined out a small ring to hold the 100 microamp meter into the Rockwell water meter housing, so that is ready to mount up. I am designing a slow triangle wave generator to drive the meter so it is not static when the lamp is on. The glass came back from the glass shop and fits nicely into the vacuum pump base. I have a large O ring on order so the glass will be held securely and softly. The pressure meter will bolt on to the flange at the top of the pipes and more pipes of various diameters will route around holding lamp holders, oilers etc. The lamp looks much taller than it really is. This will all come together and make much more sense soon.
If you google "cutaway lightsaber" you will have an idea of what I have planned for the space behind the glass in the base. I have a small cut quartz crystal on order and lots of small brass tubes, fittings and parts to play with.
12 August 2016
A bit more work on the lamp. I need to concentrate more on the horizontal piping. The "vintage" lights I have chosen are a bit bright in addition to being quite golden color, so I am going to test out a dimmer idea - put a 10 amp diode in series with the lights and use a small switch to short out the diode for full brightness. The diode eliminates one half of the sine wave giving one half power, and when the switch shorts out the diode, the lights receive both halves of the sine wave.
A bit more work on the lamp. I need to concentrate more on the horizontal piping. The "vintage" lights I have chosen are a bit bright in addition to being quite golden color, so I am going to test out a dimmer idea - put a 10 amp diode in series with the lights and use a small switch to short out the diode for full brightness. The diode eliminates one half of the sine wave giving one half power, and when the switch shorts out the diode, the lights receive both halves of the sine wave.